-40%
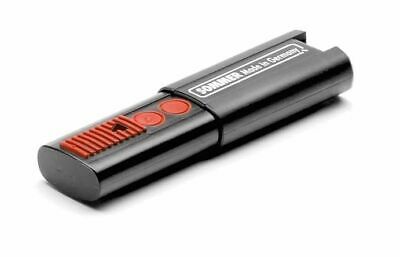
Sentry 300 030210 LCR Transmitter 2 Button Remote Controls Operators Parts
$ 11.35
- Description
- Size Guide
Description
Sentry 300 030210 LCR Transmitter 2 Button RemoteSentry 300 030210 LCR Transmitter 2 Button Remote
Operate gate or garage with compatible 433 MHz receiver Operates up to 300 ft typically.
LCR Transmitter 030210 2 Button Remote Setup: (It is recommended that the dipswitch code be changed from the default factory setting) 1. Open the battery compartment door and locate the dipswitches. 2. Change the dipswitches to the settings you prefer, record for future reference Transmitter Left Button to Receiver Programming: (standard Open/Stop/Close function) Press and hold the left transmitter button down. Red light on transmitter should be on. On the receiver, push the P1 push-button until the green LD light comes on. Release both buttons.
Transmitter Right Button to Receiver Programming: (Hold-Gate-Open) (Only if auto close timer is enabled) The 2-channel receiver allows for programming the P2 relay from momentary mode (default) to latching mode. Transmitter right button can be programmed to hold gate open, over-riding the auto-close feature if activated. Press and hold the right transmitter button down. Red light on transmitter should be on. Press the P2 push-button until the green LD light comes on. Release both buttons.
Receiver Programming: Relay P2 programming from momentary to latching mode (to hold gate open) Press the P2 push-button until the green LD light comes on, then release. Green LD light should be steady. While the green LD light is on, push the P1 push-button down and release. Green LD light should be flashing.
Resetting receiver P2 relay to momentary mode: Press the P2 push-button until the green LD light comes on, then release. Green LD light should be flashing. While the LD light is flashing, push the P1 push-button down and release. Green LD light should be steady.
Erasing Single Transmitter from Receiver Memory: The LCR Transmitter 030210 2 Button Remote dipswitch settings of the transmitter to be deleted must be known. If known follow the steps below. Set the dipswitches in a transmitter to match the switch settings of the transmitter code to delete. Press and hold the left transmitter button. On the receiver, push the P1 push-button until the green LD light comes on. Then release both. Press and hold the right transmitter button. On the receiver, push the P2 push-button until the green LD light comes on. Then release both.
Erasing all Transmitters from Receiver Memory: Press the P2 button on the receiver until the green LD light comes on. Then release P2 button. While LD light is on press the P1 and P2 buttons simultaneously and hold until the green LD light begins to blink slowly. It should blink 4 times then all transmitter codes are erased.
Verifying Receiver P2 relay is programmed to latching mode: Press the P2 push-button until the green LD light comes on, then release. Green LD light should be flashing. If green LD light is steady, redo the Receiver Programming section above.
Payments & Returns Policy


